Table of Contents
Introduction
Let me start with something very real.
Most people buy a highlighter because they see glowing skin on social media. But when they try it at home, the result is not the same. Sometimes it looks too shiny. Sometimes it looks patchy. And sometimes it disappears completely.
The problem is not the product.
The problem is lack of understanding.
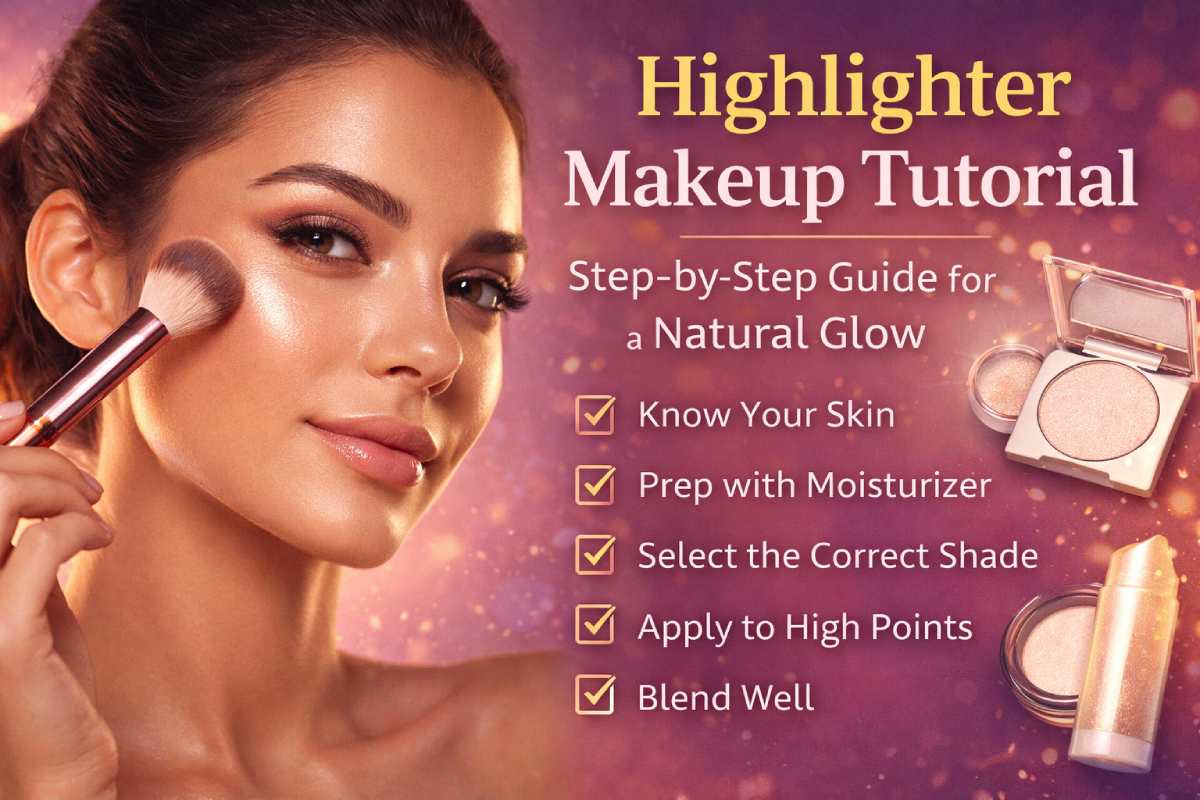
A proper highlighter makeup tutorial is not just about applying a product. It is about knowing your skin, your face shape, your lighting, and your technique.
When used correctly, highlighter can completely change your makeup look. It can make your skin look fresh, healthy, and naturally glowing without looking oily or heavy.
In this detailed guide, you will learn everything step by step in a simple way.
Understanding Highlighter Basics
Highlighter is designed to reflect light. It brings attention to the high points of your face. According to Maybelline, highlighter helps enhance facial features by reflecting light on the high points of the face.
These are the areas where light naturally hits:
- Top of cheekbones
- Bridge of the nose
- Brow bone
- Inner corners of eyes
- Cupid’s bow
When light hits these areas, your face looks more lifted and defined.
Highlighter is not meant to cover. It is meant to enhance.
According to Maybelline, highlighter helps enhance facial features by reflecting light on the high points of the face.
Why Highlighter is Important in Makeup
Many people skip highlighter. But it plays an important role.
Benefits of Using Highlighter
- Adds natural glow to the skin
- Enhances facial structure
- Makes skin look healthy
- Improves overall makeup finish
- Works for both day and night looks
A face without highlight can sometimes look flat. Highlighter adds dimension.
Types of Highlighter Explained
Choosing the right type of highlighter is very important. Each type works differently depending on your skin type and the kind of look you want.
Powder Highlighter
Powder highlighter is the most common and easiest to use.
It comes in a compact form, just like face powder. You can apply it using a brush, and it blends easily on the skin.
It is best for people who have oily skin because it does not add extra shine. It also lasts longer throughout the day.
If you are a beginner, this is the safest option to start with because it is easy to control and build slowly.
Liquid Highlighter
Liquid highlighter gives a very natural and fresh glow.
It has a light texture and blends into the skin like a serum or foundation. It does not sit on top of the skin, which makes it look more natural.
This type is best for dry skin because it adds moisture and glow at the same time.
You can also mix a small amount with your foundation to get an overall glowing look.
However, it needs a little practice because using too much can make the face look overly shiny.
Cream Highlighter
Cream highlighter is a mix between powder and liquid.
It has a soft and smooth texture that blends easily into the skin. You can apply it using your fingers or a sponge.
It works well for normal skin and gives a natural finish that is not too shiny and not too matte.
This is a good option if you want a simple everyday glow without too much effort.
Stick Highlighter
Stick highlighter is very easy and quick to use.
It comes in a stick form, so you can apply it directly on your face without using any tools. Just swipe and blend with your fingers.
This type is perfect for quick makeup, travel, or touch-ups during the day.
It works for all skin types and is great for people who want a fast and simple routine.
Step-by-Step Highlighter Makeup Tutorial for Beginners
Step 1: Skin Preparation
Clean your face
Apply moisturizer
Use primer
Skincare experts at Nivea recommend prepping skin for smooth makeup.
Step 2: Apply Base Makeup
- Foundation
- Concealer
- Light powder
Avoid heavy powder.
Step 3: Choose Correct Shade
| Skin Tone | Best Shade |
| Fair | Pearl, champagne |
| Medium | Gold |
| Dark | Bronze, copper |
Step 4: Application Areas
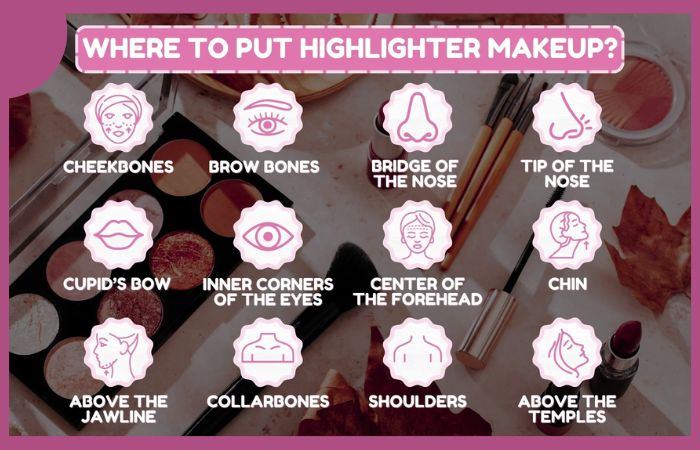
Apply only on these areas:
- Cheekbones
- Nose bridge
- Brow bone
- Inner eyes
- Cupid’s bow
Avoid applying on full face.
Step 5: Blending Technique
- Brush for powder
- Sponge for liquid
- Fingers for cream
Blend until it looks natural.
Step 6: Final Check
Check makeup in natural light.
Face Shape Based Highlighter Guide
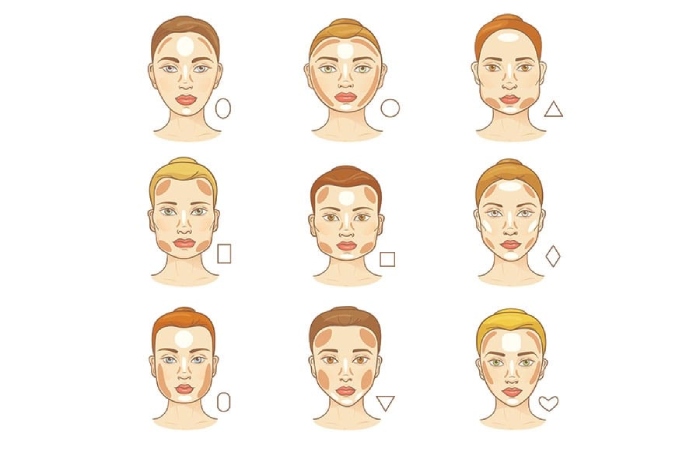
Highlighter works differently depending on your face shape. Applying it in the right areas can make your face look more balanced, lifted, and radiant. Here’s a simple guide for each face shape:
Round Face
A round face has soft curves and a similar width and height. The goal is to create the illusion of length and add definition.
How to highlight:
- Focus on the upper part of your cheekbones and slightly above them.
- Apply a small amount on the center of your forehead and chin to elongate the face.
- Avoid applying highlighter on the sides of your face, as this can make it look wider.
Tip: Blend carefully so the glow looks natural and lifts the face instead of adding extra width.
Oval Face
Oval faces are naturally balanced, with slightly wider cheekbones and a gently tapering jawline. This face shape can usually carry highlight easily.
How to highlight:
- Apply highlighter on the cheekbones, bridge of the nose, and brow bone.
- You can also add a small touch to the center of your forehead and chin for a soft, radiant look.
Tip: Keep the application light and natural, as this face shape already has a balanced structure.
Square Face
Square faces have a strong jawline and a broad forehead. The goal is to soften angles and highlight the features that create curves.
How to highlight:
- Focus on the tops of your cheekbones to bring attention upward.
- Apply a little on the center of the forehead and chin to soften the jawline.
- Avoid highlighting along the jaw, as it can make the face look even squarer.
Tip: Using a soft, diffused glow works best to balance strong facial lines.
Heart Face
Heart-shaped faces are wider at the forehead and narrow at the chin. The goal is to balance the width of the forehead and draw attention to the center of the face.
How to highlight:
- Apply on the cheekbones to emphasize the middle of your face.
- Add a small touch on the chin to soften the pointed area.
- You can also lightly highlight the bridge of the nose for a balanced look.
Tip: Avoid highlighting the upper forehead too much, as this can make the forehead appear wider.
Common Mistakes
- Using too much product
- Not blending properly
- Wrong shade
- Applying on textured skin
- Using glitter instead of shimmer
Tools for Highlighter Application
- Fan brush
- Tapered brush
- Beauty sponge
- Fingers
Highlighter for Different Skin Types
Oily Skin → Powder
Dry Skin → Liquid/Cream
Combination Skin → Mix
Latest Trends in Highlighter (2026)
- Natural glow skin
- Minimal makeup
- Glass skin effect
- Soft shimmer
Heavy glitter is going out of trend.
Daily Makeup Routine with Highlighter
- Clean face
- Moisturizer
- Foundation
- Blush
- Highlighter
- Lipstick
Frequently Asked Questions
What is highlighter used for?
To add glow and enhance facial features.
Can beginners use highlighter?
Yes, start with powder.
How to avoid over-application?
Use small amount and blend well.
Final Thoughts
Highlighter is not about shine.
It is about controlled glow.
When used correctly, it enhances your natural beauty.
Do not rush. Learn slowly. Practice daily.